Troubleshooting Security Systems
What to do after a power outage?
GE CONCORD
If House Power is OFF: Press the * key (This will silence beeping for 8 hours)
If House Power is ON: Press 1+Code, 1+Code (This will clear the alarm from memory)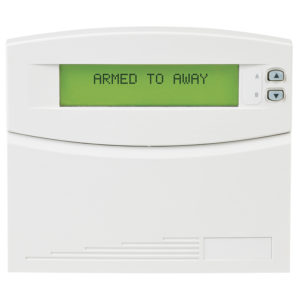
2GIG
If House Power is OFF or ON: Press the yellow triangle with the “!” in it to acknowledge the trouble signal.

GE SIMON XT
If House Power is OFF or ON: Press Status, Disarm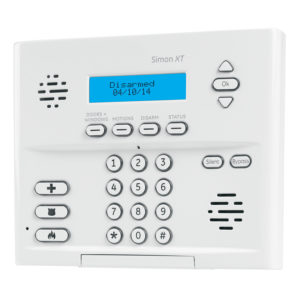
Honeywell LYNX Touch
If House Power is OFF or ON: Press More, System, Disarm or Unlock+Code
Honeywell VISTA
If House Power is OFF or ON: Press *, Code+1
DSC
If House Power is ON: Arm your system, then disarm it
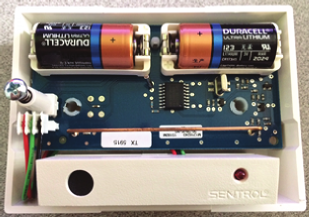
Changing a Panel Battery
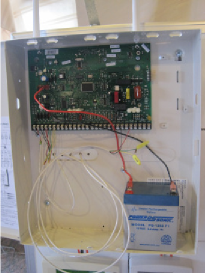
GE CONCORD
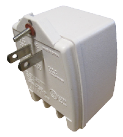
- Find the panel (also referred to as the “can”) This is commonly located in a mechanical room, basement, or closet AND Find the Transformer in a near by outlet (may be screwed in) and unplug.

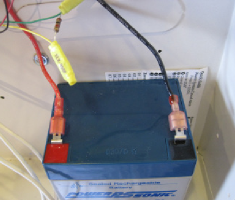
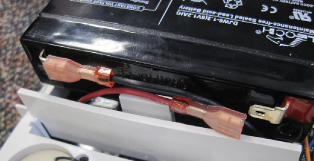
- Unscrew the Panel and open it up. You will see a blue and grey battery that resembles a small car battery.
- Please take notice on how the battery is hooked up and placed in the panel. Disconnect the Red and Black terminal wires from the battery.
- Remove the battery and take it to a Batteries Plus or Radio Shack to buy a new battery. The battery will most commonly be a 12 volt, 5 amp or 7 amp. **You may also purchase the battery from us for a part and shipping cost. Call 612.874.9295 to order.
- If there are plastic caps on the ends of the battery terminals, remove and place back in the panel and hook up Red and Black wires as they were before.
- Close the can and put the screws back in. Plug the Transformer back into the outlet AFTER installing the battery. After a minute, go to the Keypad and hit the “Status” or Asterisk button. Should read:” “System is OK”

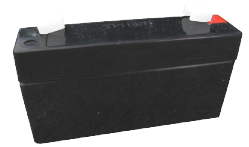
GE SIMON XT
**Simon XT Panel requires a 6v 1.4Ah battery
1. Find the Simon XT panel which should be mounted on the wall. Find the Transformer in a near by outlet (may be screwed in) and unplug.

2. On the top of the panel, unscrew the screw (if present). Press the two small buttons to open up the panel. (NOTE: Hold & slowly open the front of the panel so it does not fall off) You will see a rectangular black battery inside.
3. Please take notice on how the battery is hooked up and placed in the panel.
4. Note the two prongs at the top and bottom of the battery. Press them outwards to get the battery to pop out. **NOTE: The new battery may take up to 24 hrs to charge.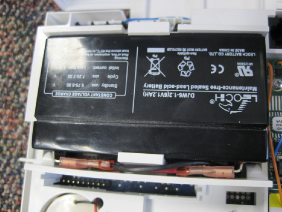
5. Pop the battery out and disconnect both the Red and/ or Black terminal wires.
6. Replace with new 6 volt, 1.4 Ah battery by connecting the appropriate terminals and pressing the battery into place.
7. Close the panel and put the screw back in the top (if present). Plug the Transformer back into the outlet AFTER installing the battery. After a minute Hit the STATUS button to see if the “Low Battery” has cleared.
If the “Low Battery” message does not disappear after 24 hrs, please call our office 612.874.9295 **
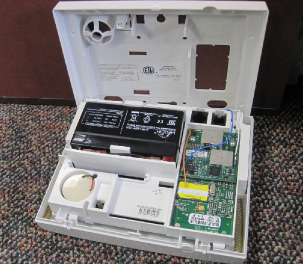
2GIG
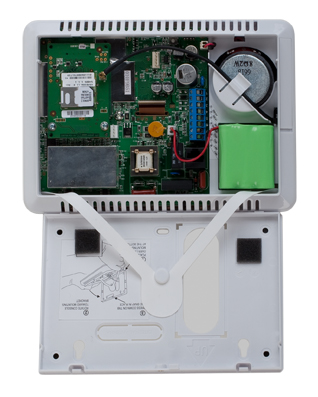
1. Call your monitoring center or Lloyd Security to place your system “On Test”
2. Disarm or turn off home alarm system
3. Locate and remove the screw on top of the keypad
4. Gently pull down the front cover down (don’t let go)
5. Locate the third hand (a plastic piece that looks like an upside down V)
6. Place the third hand over the notch in the center of the cover
7. Locate the green battery pack
8. Remove the clip that connects the battery red and black wire to the circuit board.
9. Remove the battery
10. Insert the new battery and plug in the clip
11. Unhook the third hand
12. Guide the third hand and the large red wire into the keypad
13. Close the cover and press until it snaps into place
14. Replace the screw on top of the keypad
15. Let it charge for 24 hours
Changing Sensor Batteries
Wireless EcoLink Door/Window Sensor
**Call your monitoring station or Lloyd Security and place your system “On Test” before changing the batteries
** NOTE: Removing the cover will trigger a zone tamper signal to the control panel.
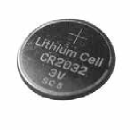
- You will need (1) 3v CR2032 Lithium battery.
- With your fingers press on the sensor up or down to release the cover; you will hear a click for the release. Magnet to the Right of sensor: Slide Up Magnet to the Left of sensor: Slide Down.
- Lift off the cover of the sensor to locate the battery.
- Remove the old battery and replace with a new CR2032 ensuring the + side of battery faces up/toward you.
- Re-attach the cover, and slide the opposite way to secure. Ensure the Top (as marked on the inside of the cover) points away from the battery. You should hear a click when the cover engages properly. (The 3 lines should be facing the magnet)
- Hit the Status button to see if the “Low Battery” signal cleared.
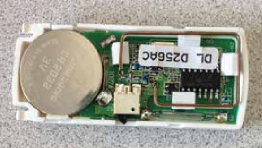
**If you are having trouble with the sensor or are still receiving “Low Battery” or “Tamper” alarms, call our Service Department at (612) 874-9295 to schedule one of our technicians to come out.
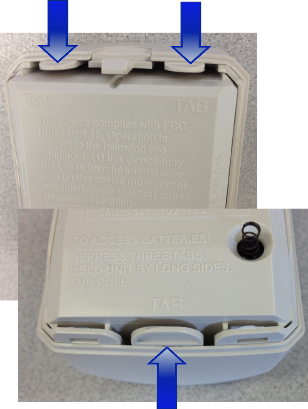
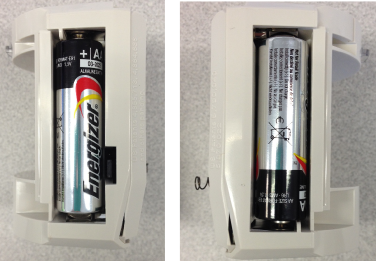
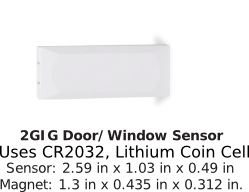
2GIG Wireless Door/Window Sensor
Changing 2GIG Wireless Door/Window Sensor
What You Will Need: (2) CR2032 lithium coin batteries, small flathead screwdriver
Battery: Two Panasonic CR2032 or equivalent Lithium batteries
*Please call the Monitoring Center or Lloyd Security before you begin to place the system in Test Mode:
24/7 Monitoring Station: 866-996-7607
Lloyd Security Office (M-F 8am-5pm): 612-874-9296
Inserting and Replacing Batteries
If a supervised sensor battery is low, a low battery notification is indicated on the Control Panel. When the 2GIG system indicates that the sensor has a low battery, replace the battery immediately. Use only the recommended replacement batteries (See Specifications). To install or replace the battery, do the following:
- To remove the sensor cover, use your finger to press the tab on the end of the case. This disengages the clip holding the cover to the base.
- Place a small flathead screwdriver in the slot between the metal clip and battery and twist the screwdriver slightly while holding back one of the black plastic edges holding the battery.
- Insert the replacement battery with the + sign facing out.
- Verify programming and RF communication with the Control Panel (see Testing).


WARNING: The polarity of the battery must be observed, as shown. Improper handling of lithium batteries may result in heat generation, explosion or fire, resulting in personal injuries. Replace only with the same or equivalent type of battery as recommended by the manufacturer (see Specifications).
Batteries must not be recharged, disassembled or disposed of in fire. Disposal of used batteries must be made in accordance with the waste recovery and recycling regulations in your area. Keep Away From Small Children. If batteries are swallowed, promptly seek medical attention.
California Only: This Perchlorate warning applies only to Manganese Dioxide Lithium
Testing
• Open the Door/Window Contact (separate the magnet from the sensor). This action causes the Control Panel to display the open zone with the assigned descriptor on top of the screen. The Security Button becomes yellow (showing that a zone is open).
Wireless Crystal Door/Window Sensor
**Call your monitoring station or Lloyd Security and place your system “On Test” before changing the batteries
- You will need a 3.0 Lithium CR123 A battery.
- Press and pinch the short ends of the contact to release the cover tab (the side with the lip will release first).
- Lift open the cover on the sensor
- Replace the batteries with CR123 in the same position as the old battery
- Snap the cover back onto the sensor.
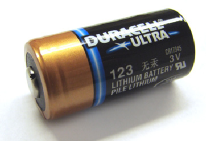
** If you are having trouble with the sensor or are still receiving “Low Battery” or “Tamper” alarms, call our Service Department at (612) 874-9295 to schedule one of our technicians to come out.
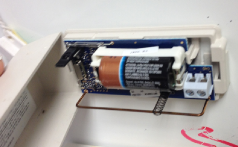
2GIG Motion Detector
If a supervised PIR battery is low, a low battery notification is indicated on the Control Panel’s touch screen. If indicated, replace the battery immediately. Use only the recommended replacement batteries (See Specifications). • Remove back cover by unscrewing bottom screw and pull back cover from bottom to top. Observe the polarity of the battery. See Figure 2. WARNING: Improper handling of lithium batteries may result in heat generation, explosion or fire, resulting in personal injuries. Replace only with the same or equivalent type of battery as recommended by the manufacturer (see Specifications). Batteries must not be recharged, disassembled or disposed of in fire. Disposal of used batteries must be made in accordance with the waste recovery and recycling regulations in your area.
Keep Away From Small Children. If batteries are swallowed, promptly seek medical attention.
California Only: This Perchlorate warning applies only to Manganese Dioxide Lithium cells sold or distributed ONLY in /California, U.S.A. Perchlorate Material‐special handling may apply. See dtsc.ca.gov/ hazardouswaste/perchlorate.
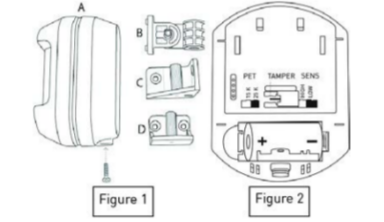
Installing and Mounting
- Remove the screw from the bottom of the case and open the PIR (see Figure 1).
- Install the 3V Lithium battery from the box.
- Set the left jumper (PET IMMUNITY) to either 33 lbs. (15 kg) or 55 lbs. (25 kg; default). (see Figure 2) 3 Set the right jumper (SENSITIVITY) to either LO (default) or HI (see Figure 2).
- Press and release the tamper switch to begin the power up process. 5 Wait 10 seconds for the PIR to fully power up.
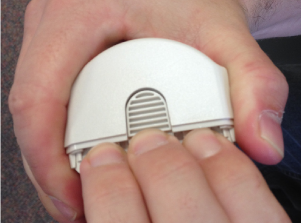
Wireless GE Motion Detector
**Call your monitoring station or Lloyd Security and place your system “On Test” before changing the batteries.
- You will need 1-2 AA Alkaline or Lithium Batteries (Note: replace with EXACTLY what is currently in the device or the device may malfunction).
- With your fingers, press on tab on the top of the motion to release the detector from its base.
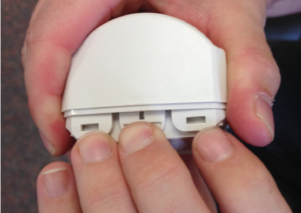
- Separate the motion detector from the base. Be cognizant of the tamper spring located on the back of the motion. Wireless GE Motion Detector Help Guide
- Looking at the back of the motion detector take note of the two (2) tabs at the top and one (1) tab on the bottom. You will be pressing these to release the cover of the motion detector from the body.
- Hold the motion with one hand and firmly squeeze to slightly bow the cover of the motion. Take your other hand and put your fingers on the top two (2) tabs. Press down and use a “pull & wiggle” technique to release the top portion of the motion.
- Flip the motion upside down and repeat the technique on the bottom tab (only one tab on the bottom) to release the bottom half of the motion.
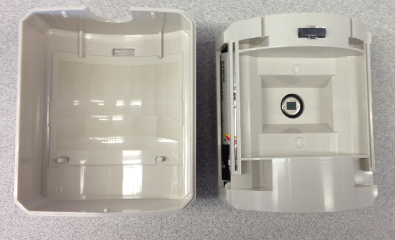
- Once the body of the motion is far enough off of the cover you should be able separate the body from the cover and you see the battery or batteries on the side(s) of the motion.
- Replace the old batteries with new. Make sure you replace with on EXACTLY the same side, same number of battery or batteries, and same model (Alkaline or Lithium).
- When finished, snap the cover back onto the body.
- Take the motion detector and snap it back onto the base starting from the bottom up and making sure the tamper switch is straight on and not bent.
- Hit the Status button to see if the “Low Battery” signal cleared


**If you are having trouble with the sensor or are still receiving “Low Battery” or “Tamper” alarms, call our Service Department at (612) 874-9295 to schedule one of our technicians to come out.
Wireless GE Glass Break Detector
**Call your monitoring station or Lloyd Security and place your system “On Test” before changing the batteries
- You will need (2) CR123 Lithium Batteries.
- Use one hand to firmly hold the base of the glass break. Use the other hand to lift off the cover from the bottom.
- Take note of the polarity of the batteries and the tamper spring on the left side located below the batteries. Ensure the tamper spring does not fall out during battery replacement, otherwise the tamper signal will not clear from the system. **Commonly there is a screw in the spring do NOT pull screw out of tamper spring**
- Remove the old batteries. Wait 10 seconds, and replace new batteries with the positive (+) polarities facing each other.
- Place cover back on base by squaring up the cover with the base and pushing the cover straight on the base (ensuring tamper spring gets pressed down and does not get bent).
- Hit the Status button to see if the “Low Battery” signal cleared

**If you are having trouble with the sensor or are still receiving “Low Battery” or “Tamper” alarms, call our Service Department at (612) 874-9295 to schedule one of our technicians to come out.
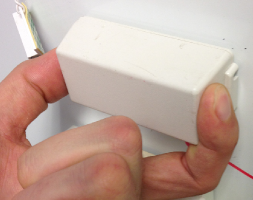
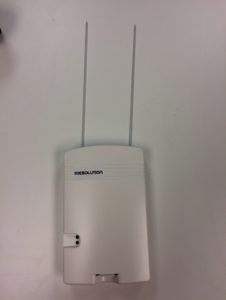
Repeater
What You Will Need: (3) AAA Alkaline batteries
*Please call the Monitoring Center or Lloyd Security before you begin to place the system in Test Mode:
24/7 Monitoring Station: 866-996-7607
Lloyd Security Office (M-F 8am-5pm): 612-874-9296
Inserting and Replacing Batteries
If a supervised sensor battery is low on the repeater, a low battery notification is indicated on the Control Panel. When the system indicates that the sensor has a low battery, replace the battery immediately. Use only the recommended replacement batteries (See Specifications). To install or replace the battery, do the following:
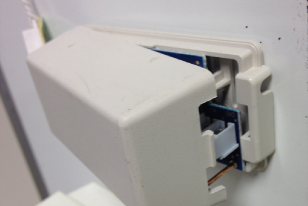
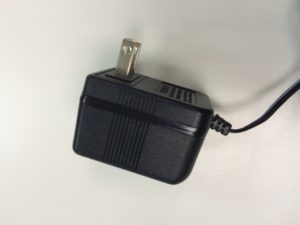
- Locate the Repeater and the black transformer (plug-in). Unplug the transformer
- Open the Repeater by pressing on the middle tab on the bottom of the device
- Remove the 3 old batteries from the device.
- **WAIT 90 SECONDS BEFORE INSERTING NEW BATTERIES**
- After 90 seconds, insert the new batteries, making note of correct polarity (+ -) (See polarity guide below).
- Plug the transformer back in.
- Press the cover back onto the base, ensure the tab snaps back in.
- Press the STATUS button (or asterisk *) button on the keypad to see if the Low Battery has cleared.
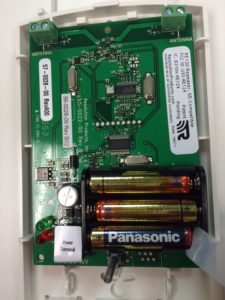
Polarity Guide: :[+ -]
[- +]:
:[+ -]
*If a tamper appears on the keypad, the repeater cover is not squarely on the base –or- the Tamper spring may have fallen out. Please remove cover and check these things.
WARNING: The polarity of the battery must be observed, as shown. Improper handling of batteries may result in heat generation, explosion or fire, resulting in personal injuries. Replace only with the same or equivalent type of battery as recommended by the manufacturer (see Specifications).
Batteries must not be recharged, disassembled or disposed of in fire. Disposal of used batteries must be made in accordance with the waste recovery and recycling regulations in your area. Keep Away From Small Children. If batteries are swallowed, promptly seek medical attention.
2GIG Equipment Specs:
2GIG Door Window Sensor
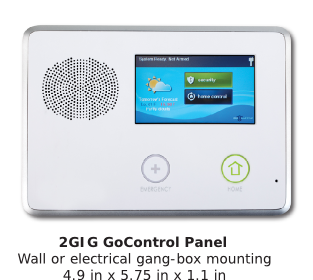
2GIG GoControl Panel
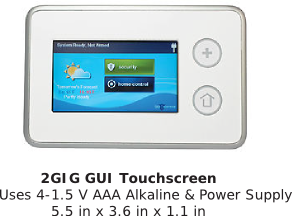
2GIG GUI Touchscreen
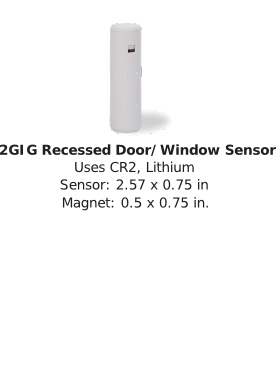
2GIG Recessed Door/Window Sensor
4 Button Keyfob

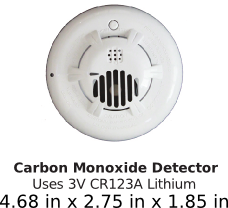
Carbon Monoxide Detector
CT100 Z-Wave Thermostat
EcoLink Door/Window Sensor

Glass Break Sensor
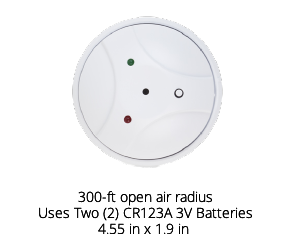
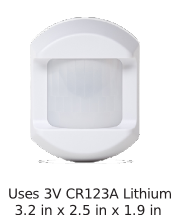
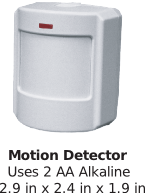
Motion Detector
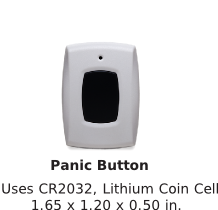
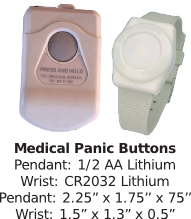
Panic Button
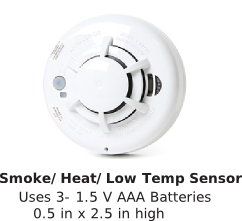
Smoke Heat Low Temp Sensor
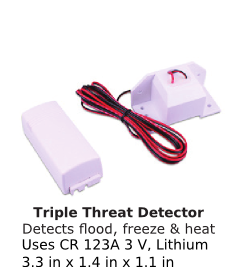
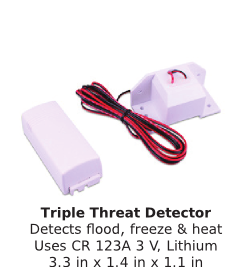
Triple Threat Detector
GE Equipment Specs:
Concord Fixed English Keypad

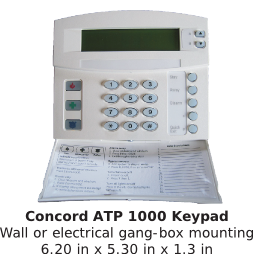
Concord ATP 1000 Keypad
Simon XT

Simon GUI 2-Way Talking Touch Screen

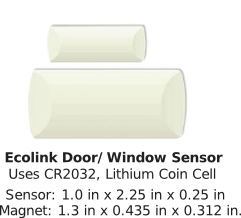
Ecolink Door/Window Sensor
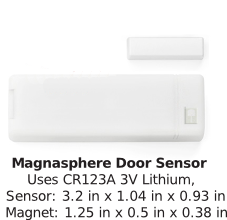
Magnasphere Door Sensor
Motion Detector
Glass Break Sensor

Medical Panic Buttons
4 Button Keyfob

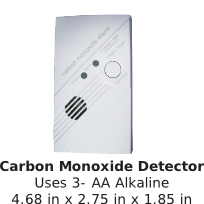
Carbon Monoxide Detector
RF Smoke Detector

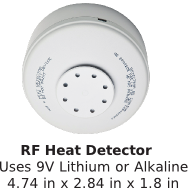
RF Heat Detector
Low Temp (Freeze) Sensor

Flood Sensor

Triple Threat Detector